Install the MedBrains OS box
MedBrains OS is one disk image with everything inside: the operating system, the database, the MedBrains server and a screen that opens MedBrains with no separate browser. There is nothing to install by hand and no command line.
Status
The image is the first bootable version. It is built and tested in virtual machines. It has not yet been tested on real hardware or a Raspberry Pi.
What you need
- A small server or mini PC with a TPM 2.0 security chip, turned on in its firmware settings. The chip encrypts the patient data on the disk.
- An NVMe or SSD disk. SD cards are not supported for data: a database wears them out, and a worn card corrupts clinical records.
- A network cable, a screen, a keyboard and a mouse.
- A phone with an authenticator app (Google Authenticator, Microsoft Authenticator or FreeOTP) for the first administrator.
Start it
- Write the MedBrains OS image to the machine's disk. Your MedBrains supplier or IT team does this; developers can follow the OS build reference.
- Connect the network cable and the screen, and switch the machine on.
- The machine's firmware logo appears, then the MedBrains logo.
If the machine has no security chip
A machine without a working TPM stops before storing anything and asks what to do.
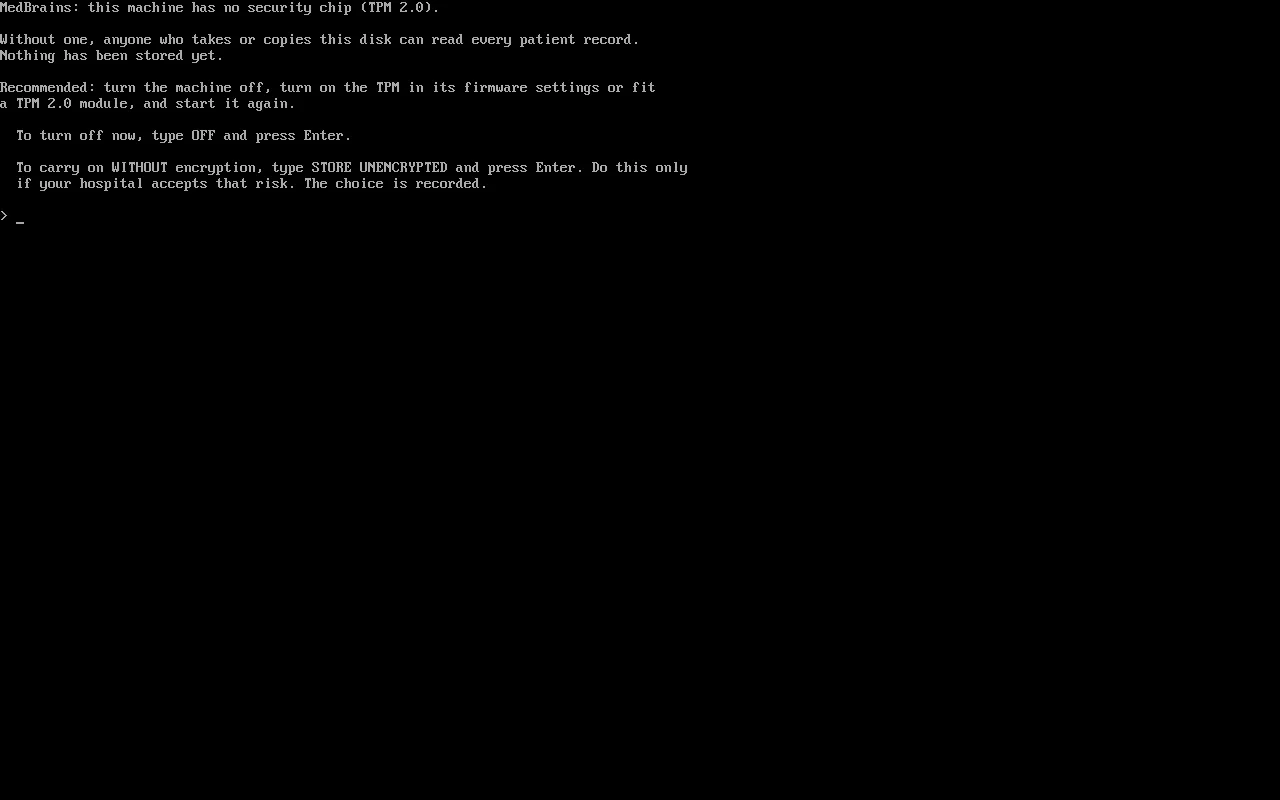
- Recommended: type
OFFand press Enter. Turn on the TPM in the firmware settings, or fit a TPM 2.0 module, and start again. - To carry on without encryption, type
STORE UNENCRYPTEDand press Enter. Do this only if your hospital accepts that anyone who takes or copies the disk can read every patient record. The choice is recorded, and the top bar then always says This disk is not encrypted.
With a TPM, the machine prepares the encrypted disk and shows a recovery key once. Write it down and keep it safe: it is typed back to confirm, and it is the only way in if the disk is moved or the board is changed.