Register a patient
Who: receptionists and front-office staff. Where: menu → Patients → Register Patient.
Registration is five steps: Intake, Contact & identity, Family · address · safety, Prefs & billing and Review. The step you are on is shown along the bottom of the screen.
1. Intake
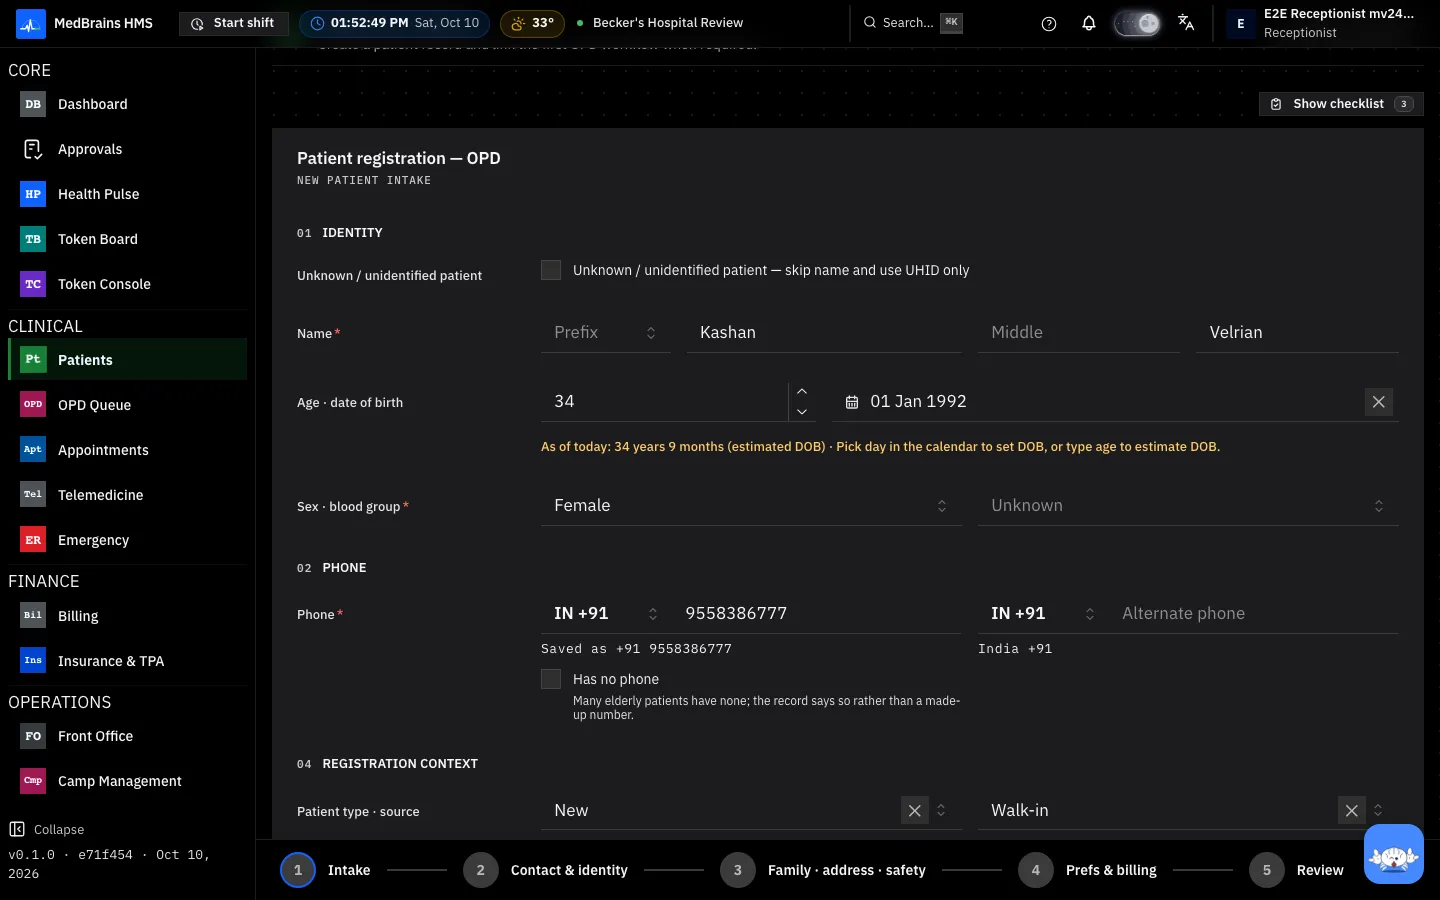
- Enter the patient's name. A patient with one name needs only the first name.
- Enter the age or pick the date of birth. Typing an age gives an estimated date of birth of 1 January; pick the exact day in the calendar when you know it.
- Choose the patient's sex. There is no default: it must be chosen.
- Enter a phone number, or tick Has no phone. Many elderly patients have none; the record says so rather than holding a made-up number.
- Under Clinical ownership, choose the department for the OPD visit, and the consultant if the patient asks for one.
For an unconscious or unidentified patient, tick Unknown / unidentified patient: the name is skipped and the patient is known by their UHID.
2. Contact & identity
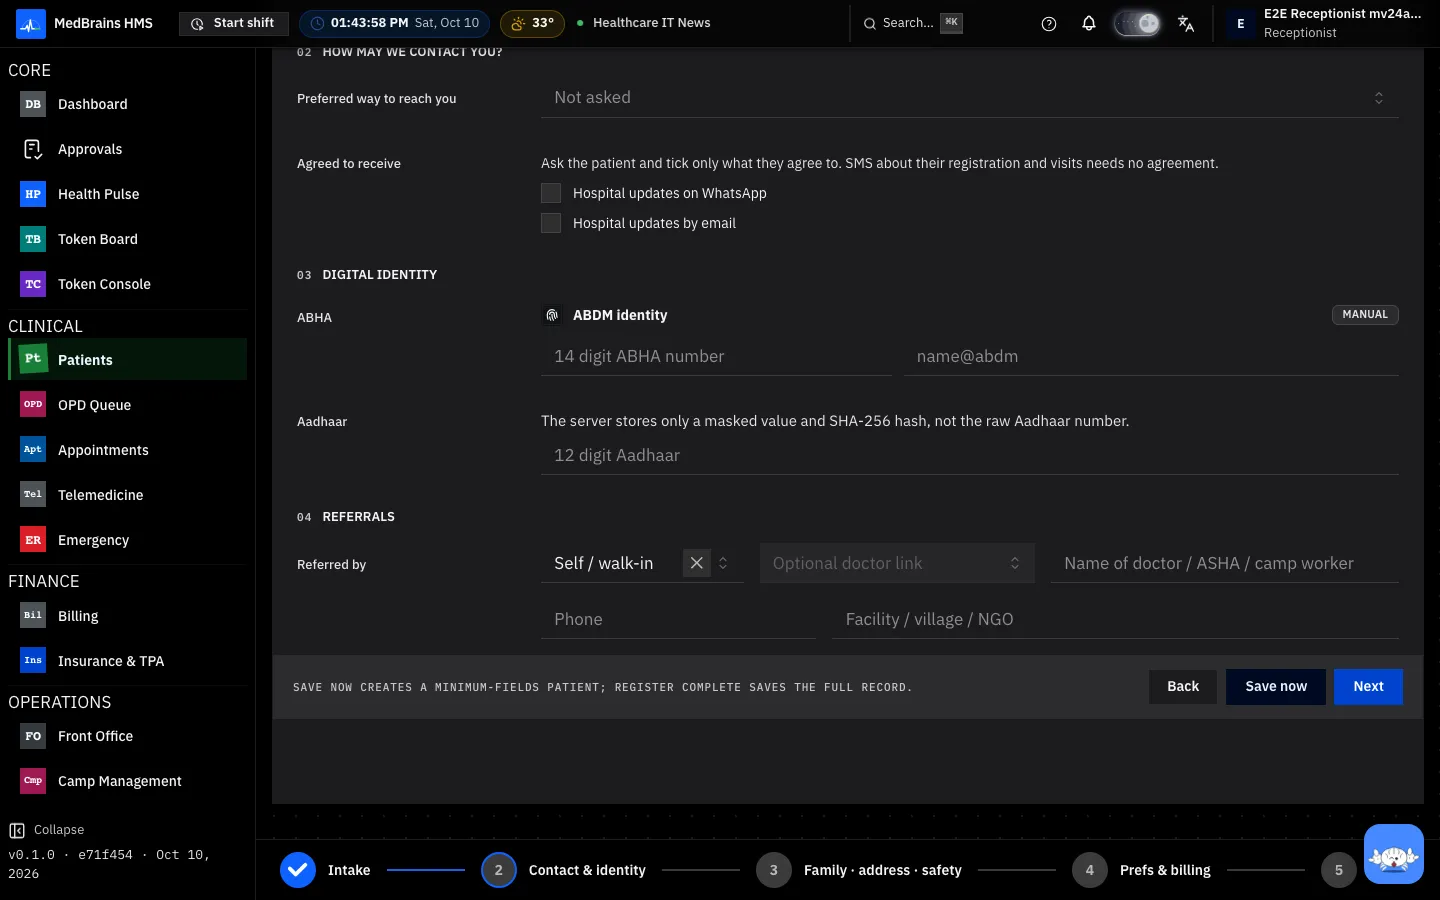
- Agreed to receive: ask the patient, and tick only what they agree to: hospital updates on WhatsApp or by email. SMS about their registration and visits needs no agreement.
- ABHA and Aadhaar are optional. Only a masked Aadhaar number is stored, never the full number.
- Referred by: who sent the patient — a doctor, an ASHA worker, a camp.
3. Family · address · safety
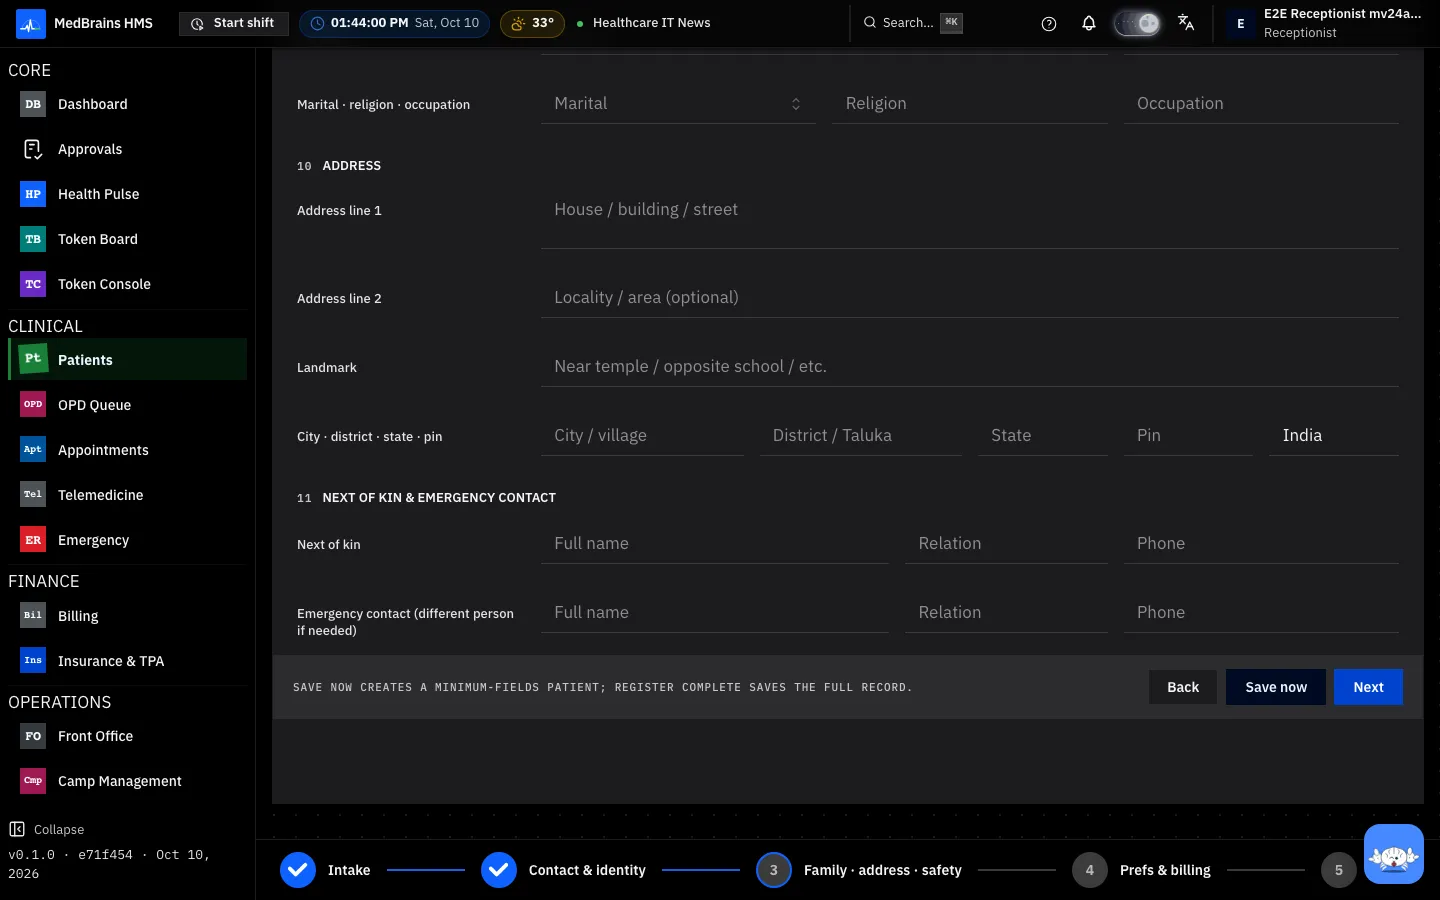
The address, next of kin and emergency contact, and the safety flags: tick Medico-legal case for an MLC (its MLC number is then required) and VIP patient where the hospital's policy says so.
4. Prefs & billing
Allergies are recorded here: the patient's known allergies, and drug allergies chosen from the hospital's drug list. Leave them empty only when the patient was not asked — the review then says Not asked yet, and the doctor sees a reminder before prescribing. Never leave a known allergy unrecorded. This step also holds dietary and room preferences and billing details.
5. Review
The review reads the record back before it is saved. Read it to the patient: name, sex, date of birth, phone, department.
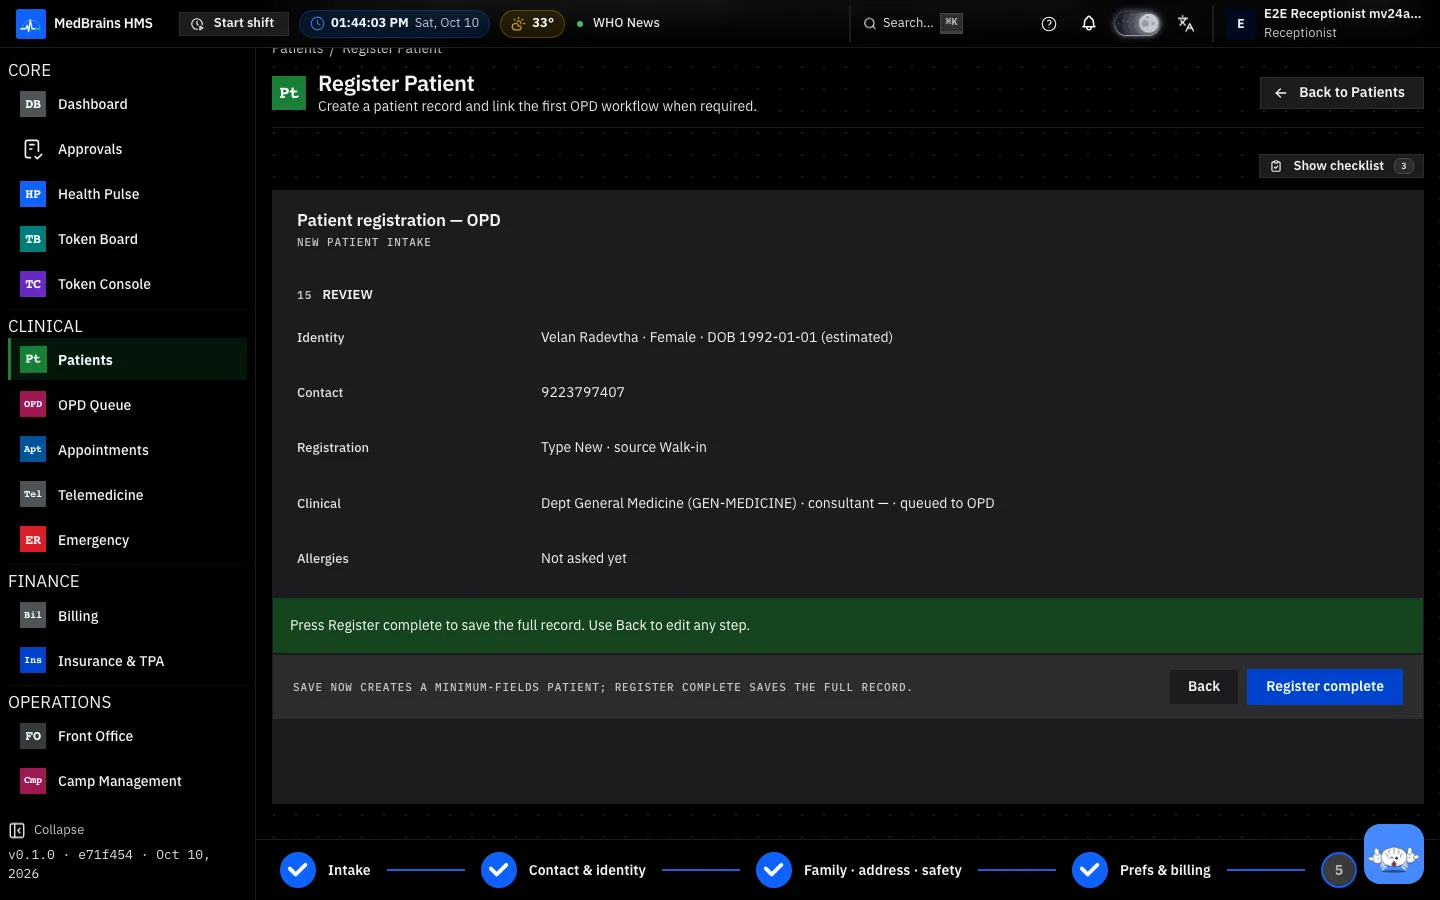
Select Register complete. When Send to OPD queue after registration is ticked (on the first step), the patient is given a token and the OPD visit opens.
Save now (on any step before Review) saves a patient with the minimum details when the queue is long. Complete the record later from the patient's page.
When something goes wrong
- Possible duplicates. If the patient may already be registered, a list of close matches appears. Open the existing record if it is the same person; register a new one only when you have checked it is someone else.
- Next does nothing. A required field is missing; the message under the field says which.
- No Patients menu, or no Register Patient button. Your role cannot register patients; ask your hospital administrator.