From order to verified report
Who: lab technicians and pathologists. Where: menu → Lab → Orders.
An order moves through five stages, shown at the top of the worklist: ordered, sample collected, processing, completed and verified.
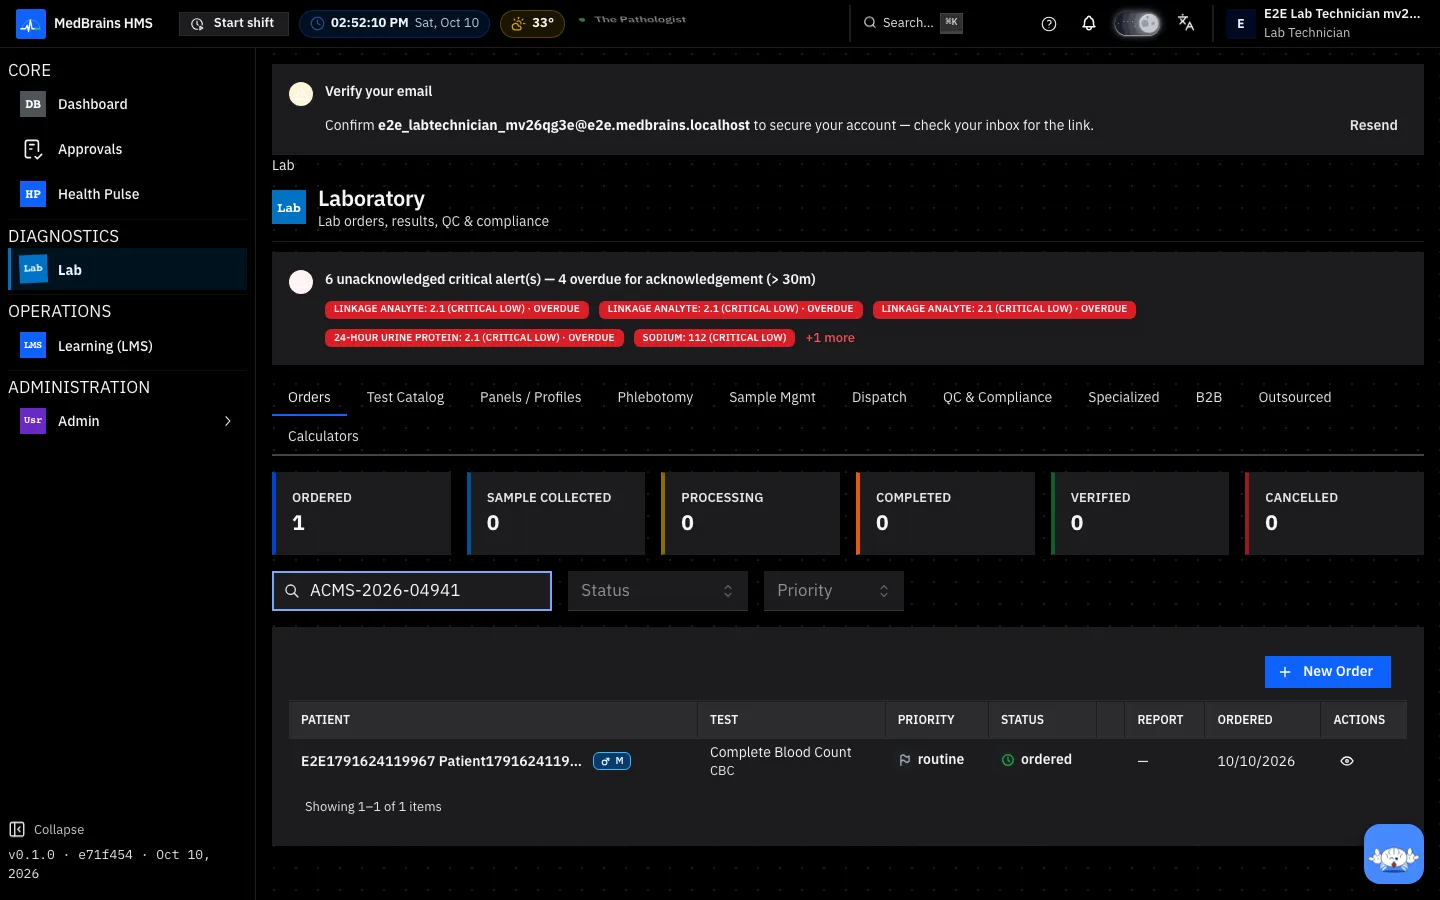
Search the worklist by patient name, UHID, phone or test. Select the eye on a row to open the order.
1. Collect the sample
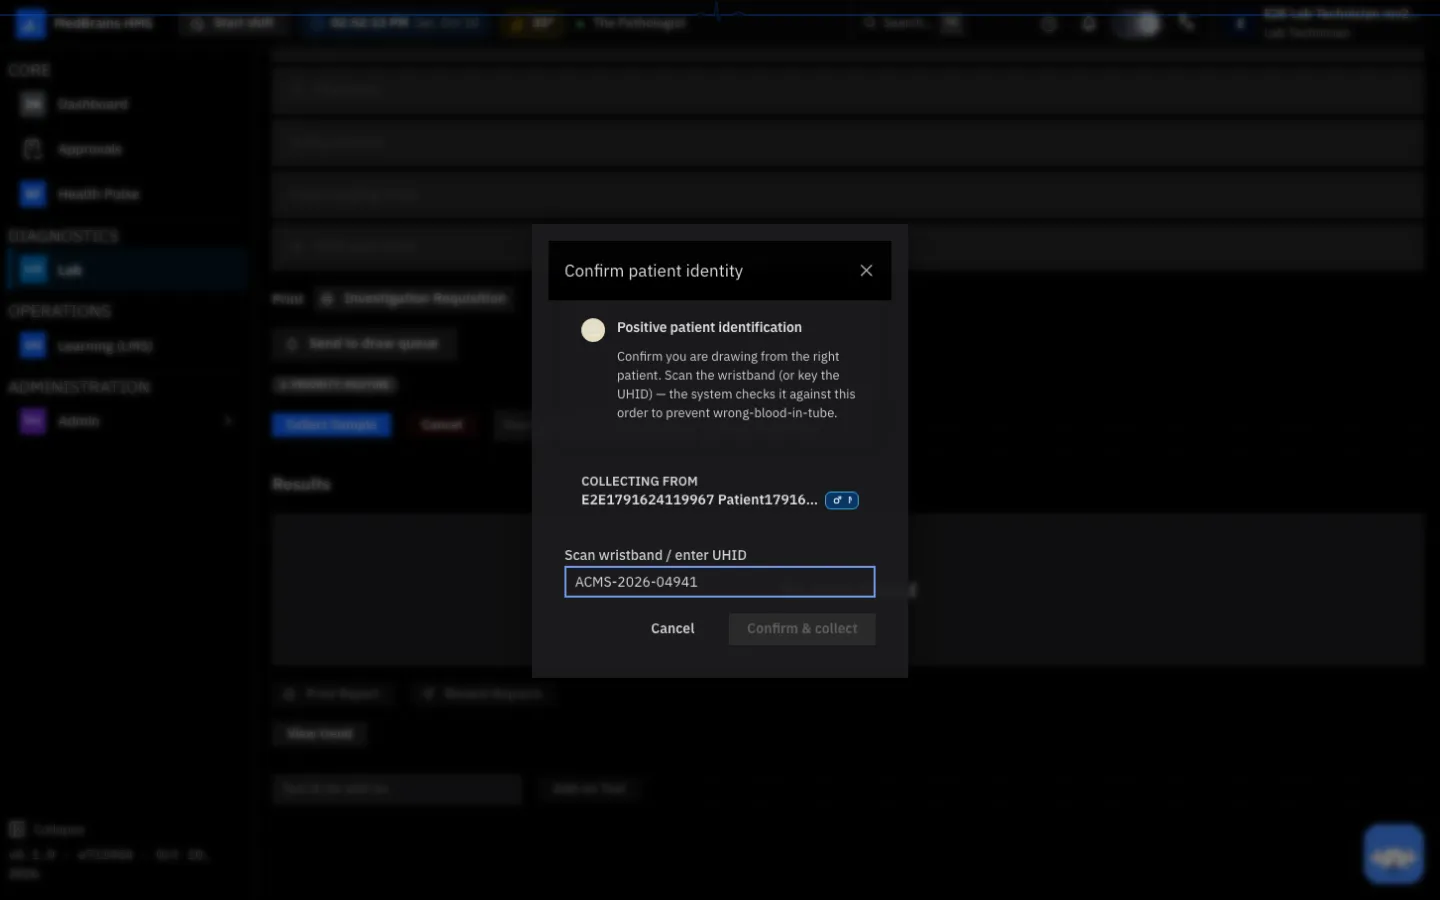
Select Collect Sample. Before anything else, confirm it is the right patient: scan the patient's wristband, or type the UHID. MedBrains checks it against the order, to prevent a sample being labelled for the wrong patient. Then select Confirm & collect.
2. Process and enter the results
- Select Start Processing when the sample is on the bench.
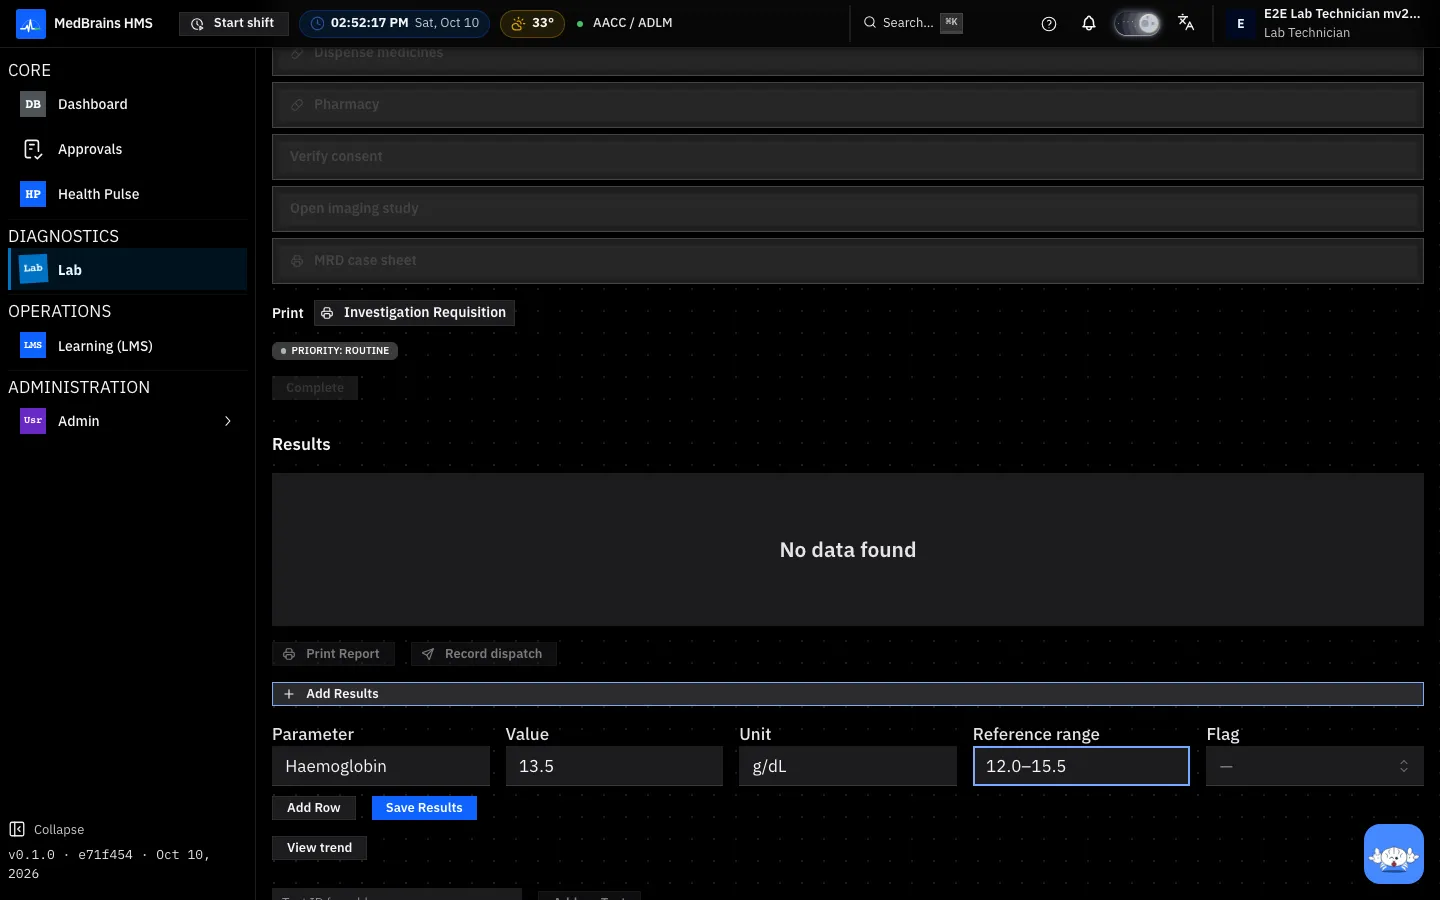
- Select Add Results. For each parameter, enter the Parameter, Value, Unit and Reference range, and the Flag when it is abnormal. Add Row adds another parameter.
- Select Save Results.
3. Complete and verify
- Select Complete. It is available only once results are saved: a test with no results cannot be completed. Completing it bills the test.
- Select Verify Results to release the result to the doctor. Only now does the doctor see it.
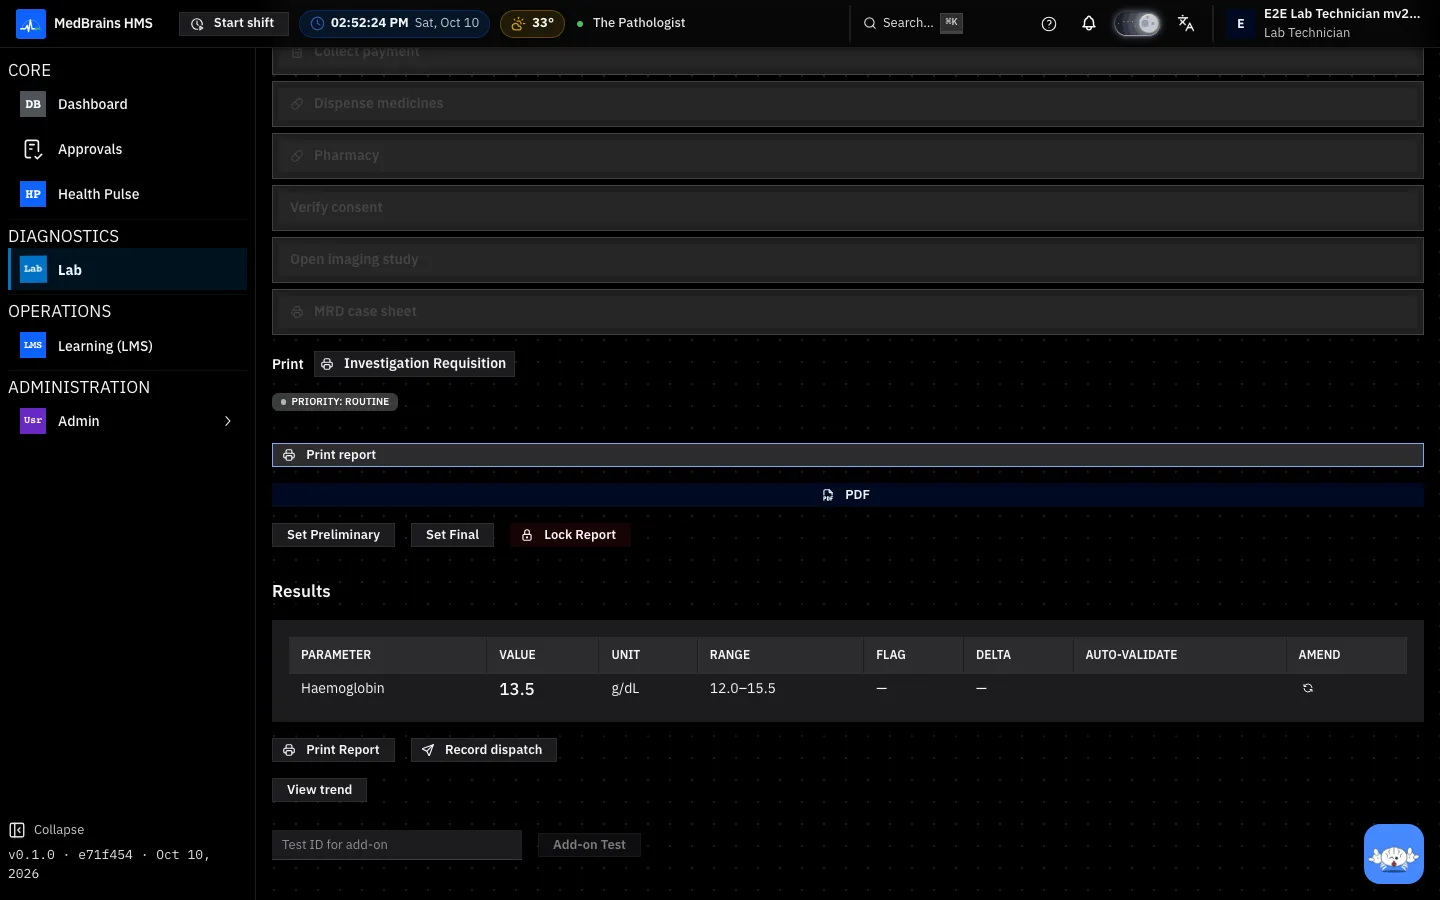
Print Report prints the released report; PDF saves it.
Critical values
A critical result shows as a red banner across the lab's screens until it is acknowledged. It cannot be released until the call to the doctor is recorded, and the person who entered a critical value cannot also be the one who releases it: a second person checks it.
When something goes wrong
- The identity check fails at collection. The UHID or wristband does not match the order. Stop: check the patient and the order before drawing.
- Complete is greyed out. No results are saved yet; hovering over it says so.
- "Could not verify results." The message says why: no results, a critical value not yet acknowledged, or a quality-control run that failed and has not been reviewed.